Monday, January 18, 2021

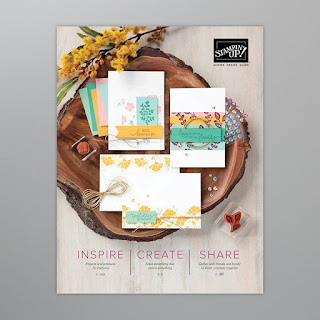
January - June Mini Catalog is Live!

 It is finally here! The January-June Mini Catalog is available to order from now, and trust me....you will have  a very difficult time trying to decide what to get first!!


Everything is so beautiful!  I wish I had an unlimited budget.


The first products I decided to get were from the Fine Art Gallery suite. I love that DSP!


Let me know if you need a catalog!


What have I been up to lately??

January Host Code - THUB24YH

Check out my Weekly Classes - Every Wednesday at 6pm LIVE on Facebook!
January-June Mini Catalog is out NOW! Click HERE
Its SALE-A-BRATION!! See the FREE items HERE

Paper Pumpkin Monthly Kit - Click to subscribe:  PAPER PUMPKIN
Annual Catalog - Click to below to view the 2020-2021 Annual Catalog


Thank you so much for stopping by my Stamping Studio!

~Jessica


Tuesday, August 4, 2020

New August-December Mini Catalog is HERE!

The NEW Mini Catalog (or formally known as the Holiday Mini Catty) is finally live for everyone to order from - YIPEE!!

And its a beauty.....You can view it by clicking below:


I am loving all the new products! It's awesome that as a demonstrator I get to order products early!! I picked out a few holiday stamp sets, a set of dies, some Designer Series Paper and a few embellishments - I can't wait to start creating with everything!!


There are SO MANY PRETTY THINGS...I haven't been able to pick a favorite yet!


All of my customers should have received a catalog in the mail - if you did not please let me know and I will send you one right away!

Please let me know if you have questions or need assistance with anything - I am HAPPY to help!

ALSO--Our online store was upgraded overnight. I spent some time browsing in the new platform this morning and it is incredible! GREAT JOB STAMPIN' UP!! If you are having trouble...again please let me know if I can help.

I hope you have a great week! I hope you'll join me Wednesday at 6pm for my weekly Facebook Live stamping class.


What have I been up to lately??

August Host Code - KA3YTA6Q
Mystery Host Month!! All orders have a chance to win!
August-December Mini Catalog is out NOW! Click HERE

Paper Pumpkin Monthly Kit - Click to subscribe:  PAPER PUMPKIN
Annual Catalog - Click to below to view the 2020-2021 Annual Catalog


Thank you so much for stopping by my Stamping Studio!

~Jessica

Wednesday, July 1, 2020

NEW Class - Under My Umbrella Class-To-Go!

Today I am releasing my new Class-To-Go!

These projects were SO much fun to create and I am excited to share these cards with everyone!! I used one of my favorite stamps sets and a coordinating punch that I was happy to see carried over from the last mini catalog. This class is full of fun, happy cards!


The class includes:

Under My Umbrella stamp set
Umbrella Builder punch
Pre-cut cardstock package containing all pieces needed to make 3 cards
Exclusive PDF tutorial with instructions and pictures to help you create these cards

Cost is $45 including shipping


If you would like to purchase this class, please send me an email: 

     jessicae.schnoor@yahoo.com

I will send you the link to sign up & pay for this class. 

Please let me know if you have any questions!


What have I been up to lately??

July Host Code - 9JDT7BNY
Its my Anniversary! - Gift with $50 purchase!
Paper Pumpkin Monthly Kit - Click to subscribe:  PAPER PUMPKIN
Annual Catalog - Click to below to view the 2020-2021 Annual Catalog


Thank you so much for stopping by my Stamping Studio!

~Jessica

Thursday, April 30, 2020

Above The Clouds - Emboss Resist Technique


Today I'm sharing another card I made using the Above the Clouds bundle, and this one uses the Emboss Resist technique.


Emboss Resist is a technique using heat embossing and sponging. I heat embossed the clouds with White embossing powder onto Whisper White cardstock, and then I sponged Balmy Blue ink over it, making those clouds really pop!


You can control the amount of ink used and how much you blend to really make a beautiful background.


Just like the last card I shared, it makes a great "sky-scape" for those hot air balloons!


I hope you enjoy this card! All the details are below:


PRODUCTS USED:
STAMPS:  Above The Clouds
INK:  Balmy Blue, Night of Navy, Versamark
CARDSTOCK: Night of Navy, Crumb Cake, Balmy Blue, Whisper White
ACCESSORIES:  Hot Air Balloon punch, White embossing powder, Heat Tool, Sponge Dauber, Stitched Shapes dies, Stampin' Dimensionals

Measurements:
Night of Navy Base 5 1/2” by 8 1/2”, scored at 4 1/4
Night of Navy layer - 3-1/8” by 4-1/8"
Whisper White - 3" by 4"
Crumb Cake - 2" by 3" for balloon
                        2-1/2" by 2-1/2 for circle
Night of Navy and Balmy Blue - scraps for the banner triangles


1.  After cutting and scoring the base, fold in half.
2.  Stamp the clouds on Whisper White cardstock using Versamark ink, sprinkle White embossing powder over the ink and heat emboss.
3.  Sponge Balmy Blue ink over the entire piece of Whisper White using a dauber until you have the desired coloring. Adhere to the Night of Navy layer, and attach this to the card front using Stampin' Dimensionals.
4.  Stamp balloon image and greeting onto Crumb Cake cardstock pieces using Night of Navy ink. Punch the balloon out, and cut the circle with the Stitched Shapes die.
5.  Punch out 2 triagles of each color - Night of Navy and Balmy Blue - for the banner.
6.  Attach the hot air balloon and the banner pieces to the card front using Stampin' Dimensionals.
7.  Adhere the circle to the card front, using Stampin' Dimensionals on the edges where it hangs over.

What have I been up to lately??

NEW--Retirement List -- Annual Catalog Last Chance list
                                                     Spring Mini Catalog Last Chance list

April 2020 Host Code - 49YNBBVP
Paper Pumpkin Monthly Kit - Click to subscribe:  PAPER PUMPKIN
Annual Catalog - Click to below to view the 2019-2020 Annual Catalog

https://su-media.s3.amazonaws.com/media/catalogs/2019-2020%20Annual%20Catalog/20190602_AC_en-US.pdf


Thank you so much for stopping by my Stamping Studio!

~Jessica
 

Tuesday, April 28, 2020

Above The Clouds - Watercolor Wash Technique


Isn't this card pretty? I love the color combo - its so classic and I've used it on quite a few different projects this past year.  I've said it before and I'll say it again....Lovely Lipstick is retiring and I am really going to miss it!!

ALSO - the background is the Swirls & Curls embossing folder -- ALSO retiring!!


This card was made with a technique called Watercolor Wash. I used an Aqua Painter filled with water and wet the watercolor paper down first. Then I dipped the brush into Pool Party ink --I like to squeeze the ink pad leaving a pool of ink in the lid -- and "washed" the ink all over the watercolor paper to create the background. For this specific card, I concentrated more ink in the center area for a darker look and blended outward for a lighter wash on the edges. Note that I didn't go all the way to the edge, but you can if you want! Then I stamped a few clouds over it when it dried. This made the perfect base to mount those beautiful balloons on!


I hope you like this card! All the details to make it are below:


PRODUCTS USED:
STAMPS:  Above the Clouds
INK: Lovely Lipstick, Pool Party, Memento Tuxedo Black, Versamark
CARDSTOCK:  Lovely Lipstick, Pool Party, Rococo Rose, Whisper White, Fluid 100 Watercolor paper
ACCESSORIES:  Hot Air Balloon punch, White Embossing powder, Heat Tool, Stitched Shapes dies, Aqua Painter, Swirls & Curls embossing folder, White Baker's Twine, Stampin' Dimensionals, Mini Glue Dots

Measurements:
Lovely Lipstick Base - 5-1/2” by 8 1/2”, scored at 4-1/4"
Lovely Lipstick embossed layer - 5-1/4 by 4"
Pool Party strip - 4-3/4" by 1/2"
Watercolor paper - 3" by 4-3/4"
Lovely Lipstick - 2" by 3" for the balloon
Rococo Rose - 2" by 3" for the balloon
Whisper White - 2-1/2" by 2-1/2" for the circle
16"of White Bakers twine

1.  After cutting and scoring the base, fold in half.
2.  Emboss the Lovely Lipstick cardstock with the Swirls & Curls embossing folder and adhere to card front.
3.  Using the Watercolor Wash technique with Pool Party ink, apply the ink to the watercolor paper.
4. Stamp the two balloon images onto the Lovely Lipstick and Rococo Rose pieces using Versamark ink, sprinkle on White Embossing powder and heat emboss. Punch these out with the Hot Air Balloon punch.
5.  Stamp your greeting onto the Whisper White cardstock with Memento Tuxedo Black ink, and cut the Stitched Shape circle die. Stamp the tiny heart with Lovely Lipstick ink.
6.  Cut the bakers twine in half, and with both pieces together tie a bow.
7.  When the watercolor paper is dry, stamp the cloud image with Pool Party ink.
8.  Adhere the Pool Party scrap to the back of the watercolor paper with about 1/4" showing on the left, and then adhere to the card front.
9.  Attach the two balloons and the circle with Stampin' Dimensionals, and then attach the bow with a Mini Glue Dot.

What have I been up to lately??

NEW--Retirement List -- Annual Catalog Retirement List
                                                     Spring Mini Catalog Retirement List

April 2020 Host Code - 49YNBBVP
Paper Pumpkin Monthly Kit - Click to subscribe:  PAPER PUMPKIN
Annual Catalog - Click to below to view the 2019-2020 Annual Catalog

https://su-media.s3.amazonaws.com/media/catalogs/2019-2020%20Annual%20Catalog/20190602_AC_en-US.pdf


Thank you so much for stopping by my Stamping Studio!

~Jessica